You are using an out of date browser. It may not display this or other websites correctly.
You should upgrade or use an alternative browser.
You should upgrade or use an alternative browser.
Mice in RTV
- Thread starter ItBmine
- Start date
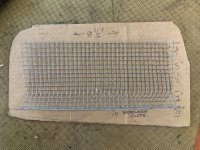
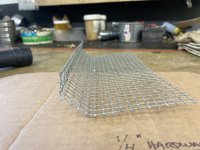
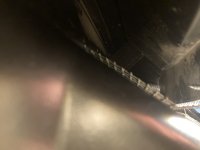
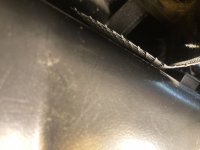
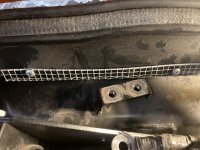
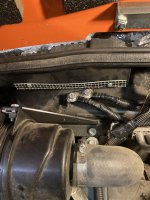
I took 20 minutes and made and installed a screen as I mentioned in an earlier post. The "FIX" is simple, quick and should keep mice out of the fresh air section! It is made with 1/4" hardware cloth (8" x 4.5") bent as shown in the photos. Access to the opening is limited, but it is easier to install the piece by first removing the two bolts that secure two ground straps using a 12mm socket. The cloth is then easily be put in place. I used two 1/2" sheet metal screws to secure it to the baffle. This is very cheap insurance against the damage just one mouse can do  . Taking pictures up behind the baffle is difficult but JPG 1251 & 1256 shows the screen resting on the fresh air opening on the passenger side and JPG 1252 show the driver's side. JPG 1253 shows the ground terminals removed. JPG 1250 shows the angles needed to allow for enough down pressure and the angle of the small amount needed to secure it to the baffle.
Attachments
Excellent. I would run out today and get some, but we are getting our first winter storm of the season right now. Been checking out the heater and the FWD. FWD works excellent, the heat is literally baking me out of the cab and it is 15 degrees here. I have around 6" on fresh snow on the ground since last night with a couple more inches coming this afternoon. Tennessee doesn't get much snow, but when we do, it's a big event.I took 20 minutes and made and installed a screen as I mentioned in an earlier post. The "FIX" is simple, quick and should keep mice out of the fresh air section! It is made with 1/4" hardware cloth (8" x 4.5") bent as shown in the photos. Access to the opening is limited, but it is easier to install the piece by first removing the two bolts that secure two ground straps using a 12mm socket. The cloth is then easily be put in place. I used two 1/2" sheet metal screws to secure it to the baffle. This is very cheap insurance against the damage just one mouse can do. Taking pictures up behind the baffle is difficult but JPG 1251 & 1256 shows the screen resting on the fresh air opening on the passenger side and JPG 1252 show the driver's side. JPG 1253 shows the ground terminals removed. JPG 1250 shows the angles needed to allow for enough down pressure and the angle of the small amount needed to secure it to the baffle.
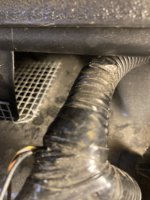
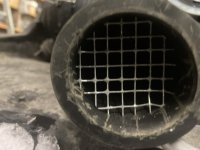
I am going to cut and form a screen to go over the engine intake tube, also.
Well, finally got around to making the screen covers last night. Last weekend, I was performing general vehicle maintenance on all of my motor powered equipment. Pulled off the air filter cover on my X1100C and yup.......fresh acorns stuffed inside. Damn mice. So, installing both the HVAC fresh air intake screen and the engine air intake screen today. That should stop them.......now, they will just find another area to squirrel their acorns in, at least it won't be in my HVAC vent or engine air filter.I took 20 minutes and made and installed a screen as I mentioned in an earlier post. The "FIX" is simple, quick and should keep mice out of the fresh air section! It is made with 1/4" hardware cloth (8" x 4.5") bent as shown in the photos. Access to the opening is limited, but it is easier to install the piece by first removing the two bolts that secure two ground straps using a 12mm socket. The cloth is then easily be put in place. I used two 1/2" sheet metal screws to secure it to the baffle. This is very cheap insurance against the damage just one mouse can do. Taking pictures up behind the baffle is difficult but JPG 1251 & 1256 shows the screen resting on the fresh air opening on the passenger side and JPG 1252 show the driver's side. JPG 1253 shows the ground terminals removed. JPG 1250 shows the angles needed to allow for enough down pressure and the angle of the small amount needed to secure it to the baffle.
Just had a $650 bill from varmints chewing on her car wires. 
Bought these. Can't say if they're the best out there but I got the 4-pack for something like $5 on an auction site so I went for it.
Instead of installing them on the vehicle(s), I strapped them to motorcycle size batteries and put near the vehicles. The only way I can see if they're working is to watch the chipmunks. They used to scurry and hide under the vehicles before making a run for their destination. They don't do that anymore.
Thanks for the tips, fellows. I store my RTV900 under cover at our off-the-grid woodland near Ellsworth, Wis. Last week, I forked out $916 to Johnson Tractor to repair leaky hoses and shredded electrical wires that disabled my cooling system (fortunately discovered before I ruined the almost-new engine). I've retaliated by dosing the machine with peppermint extract and fresh DeCon blocks -- which have already resulted in two dead mice on the cab floor. And it's not even fall yet in western Wisconsin. I appreciate the motorcycle-battery idea on powering the ultrasonic devices. How does one go about wiring that to supply these 110V AC devices?
No idea. Why do you want that? 12V DC is the power supply for almost all vehicles. If you want something running on 110V AC, you're looking for something for a home application.I appreciate the motorcycle-battery idea on powering the ultrasonic devices. How does one go about wiring that to supply these 110V AC devices?
I had that back in January with my car. I bought all the recommended sprays and pouches, nothing worked. My exterminator put out poison boxes in the carport. I have found a couple of dried up mice bodies in my vehicles engine compartments this summer, so I guess those were working? He probably needs to put new ones out.Just had a $650 bill from varmints chewing on her car wires.
Bought these. Can't say if they're the best out there but I got the 4-pack for something like $5 on an auction site so I went for it.
Instead of installing them on the vehicle(s), I strapped them to motorcycle size batteries and put near the vehicles. The only way I can see if they're working is to watch the chipmunks. They used to scurry and hide under the vehicles before making a run for their destination. They don't do that anymore.
Other than installing the hardware cloth over the air intakes for HVAC and engine air I spray the wire harnesses and heater hoses, etc. with capsaicin. It works and, if under cover, lasts quite a while. I use the capsaicin spray made for spraying fence post to deter horses from chewing on them. Works wonders. I use it on small engine machines I put away for the winter. No more chewed wires, gas caps and nests in the shrouds.

